

Want to add images
to your notebooks?
Let’s walk through the methods!
Mini Book Covers
I’ve got your back with a free Canva template and a video to guide you in using the template. Use mini book covers in the Simple Little Reading Log, the Reading Journal, or in your Planner!
Watch the video to understand the template.
Make sure you have a Canva account before accessing the template.
Once you’ve clicked the link to the template, click VIEW TEMPLATE/USE TEMPLATE FOR NEW DESIGN - not Edit Template. This will make a copy of the template so you don’t modify the original.
Rename the copy so you know that one is yours, and close the original template so you don’t modify it.
Watch and follow along with the simple process of using the mini book cover free template on Canva.
Follow These Steps
Make a copy of the template
Google Image search for the book covers you need, and save them to your computer.
Drag and drop the images into the uploads area of Canva.
Duplicate the rectangle cover page and the square cover page before you begin adding images, so you always have a blank template to work from. The duplicate icon is above the top right corner of each page and looks like a double rectangle with a plus sign.
Drag and drop the book covers, according to shape, into the template pages. Some will get cropped, so just double-click to center the image and adjust it as best as you can.
Once you’ve finished adding book covers, download the file as a PDF.
Print your book covers onto sticker paper. I recommend these Standard White Matte Sticker Sheets from Online Labels.
If you’re fancy, you can use your Cricut or Silhouette to cut them out. Otherwise, get your scissors ready!
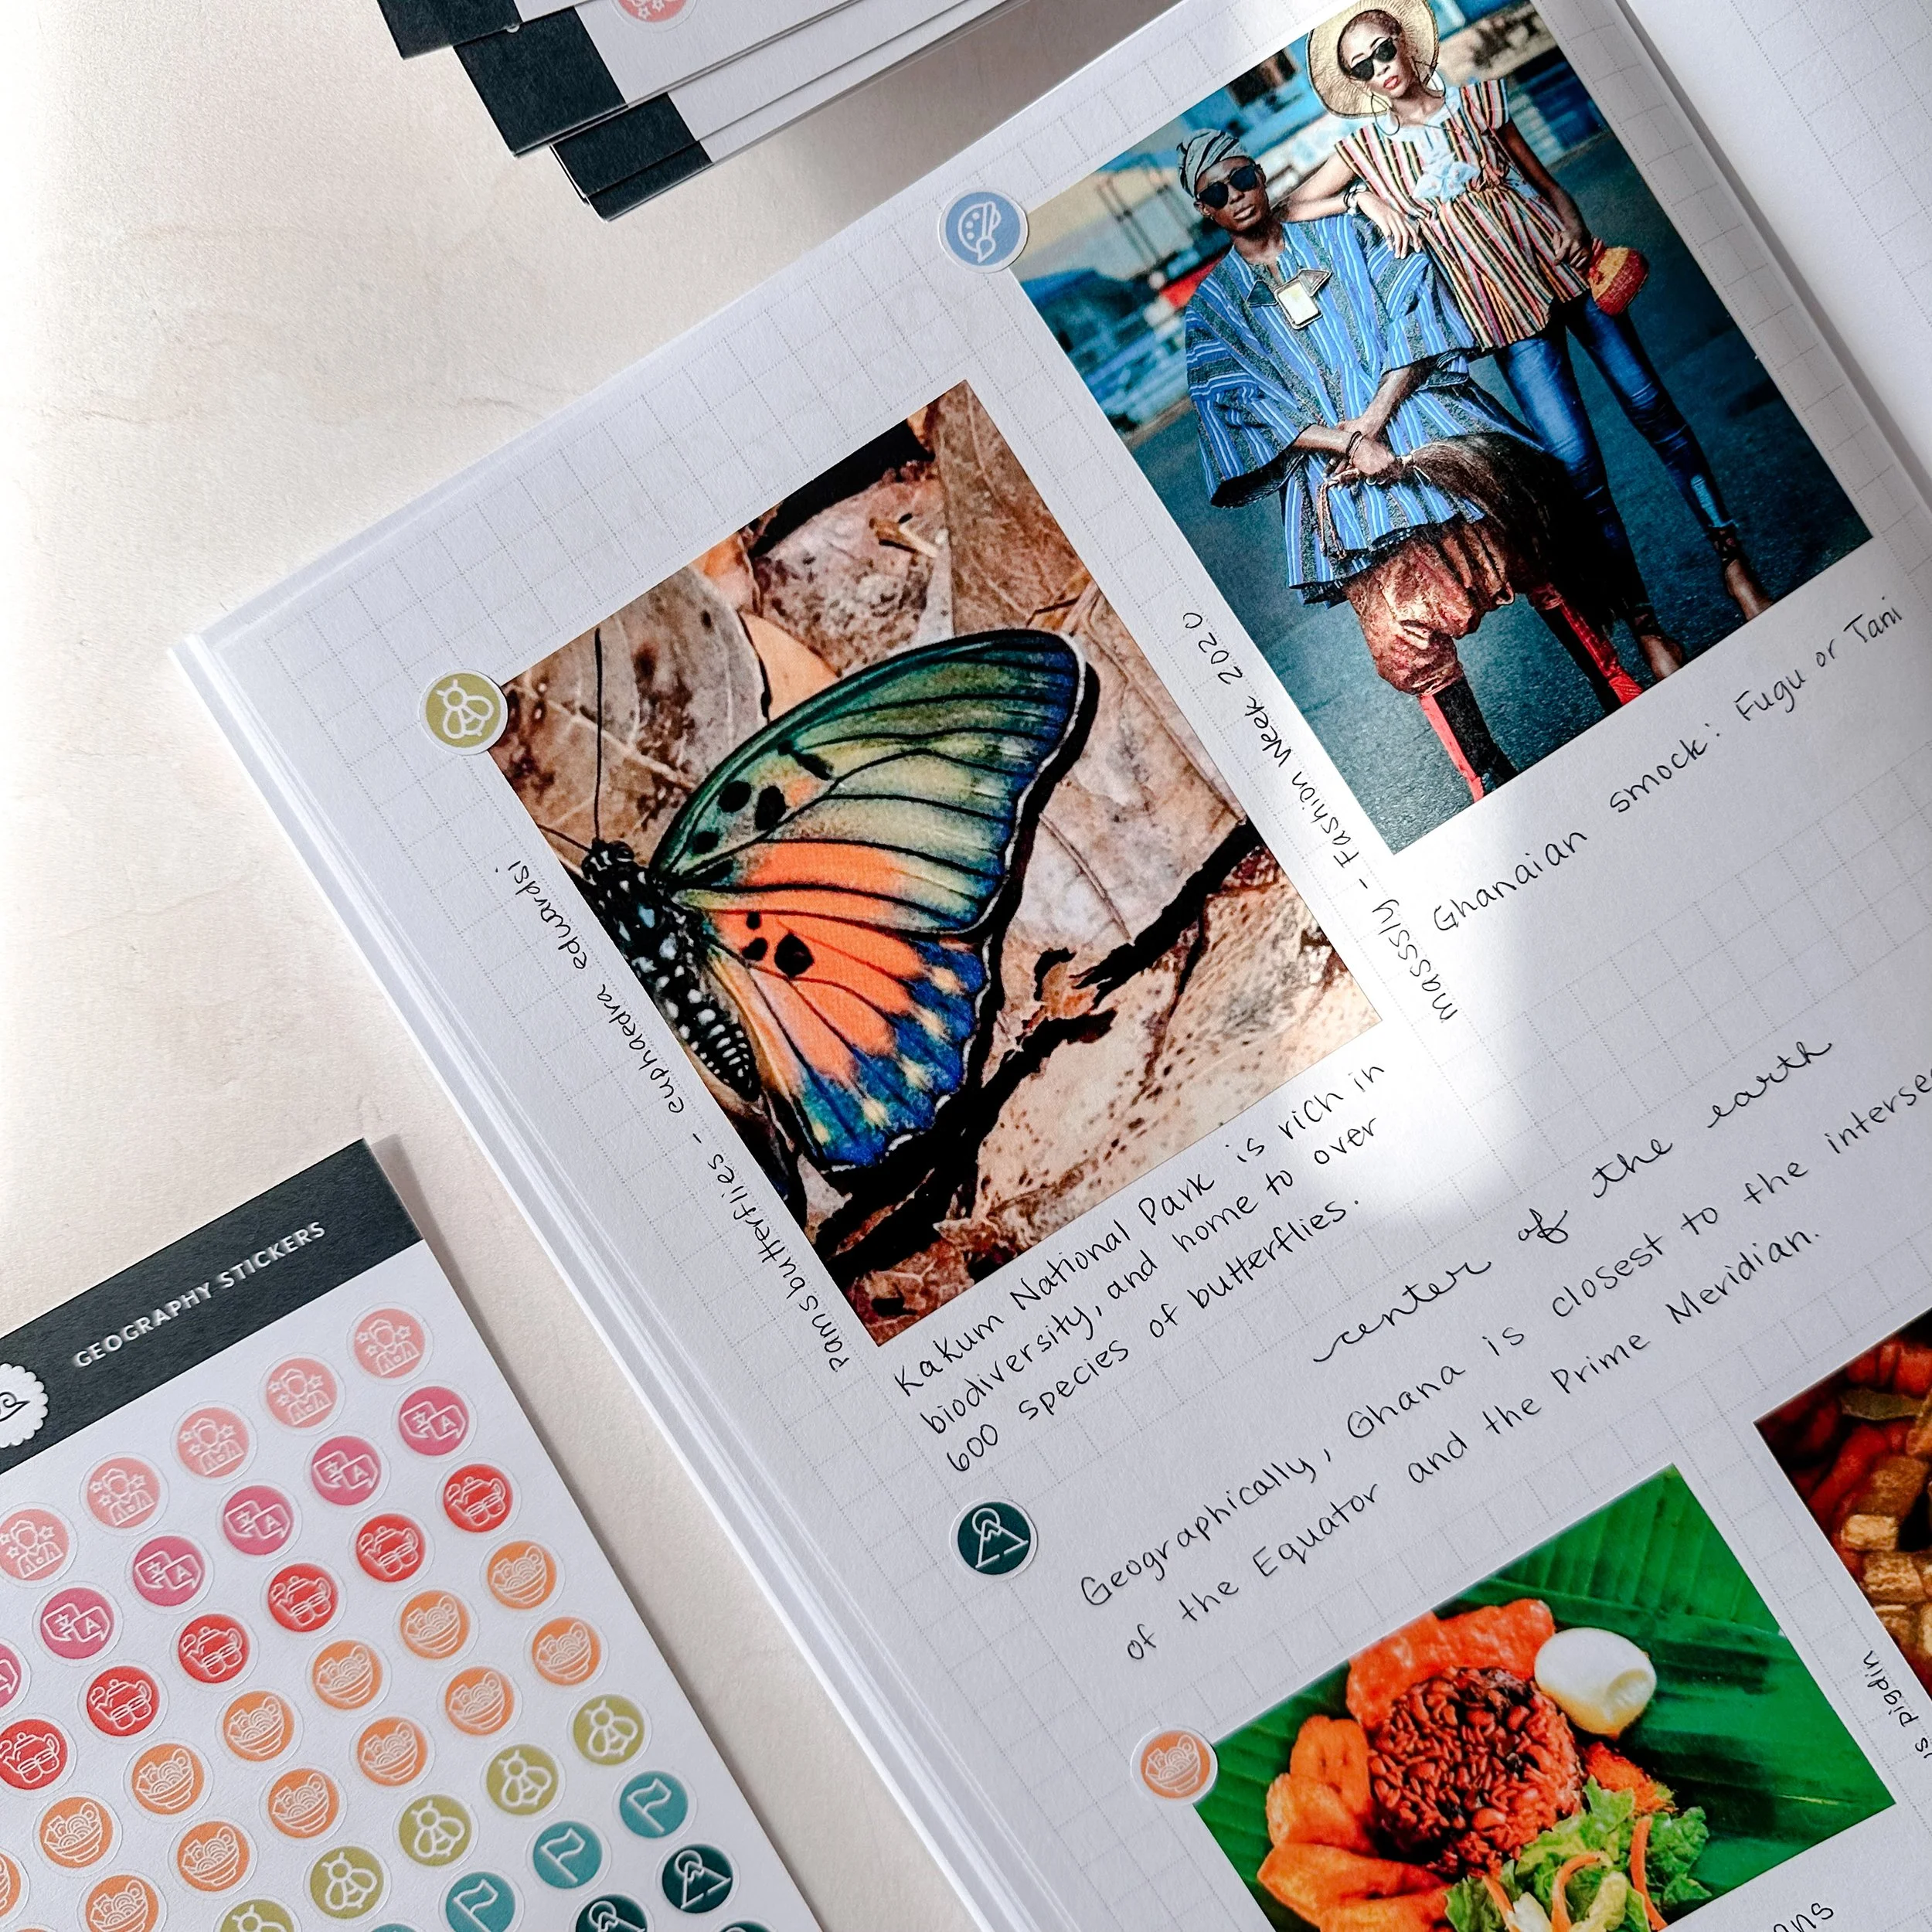
Geography Notebook Images
To add visual interest to your Geography Notebook pages, add images from your research and print them to the correct size using the free Canva template. Use this template for the USA Geography Notebook or the World Geography Notebooks.
Watch the Mini Book Cover Canva video.
Make sure you have a Canva account before accessing the template.
Once you’ve clicked the link to the template, click VIEW TEMPLATE/USE TEMPLATE FOR NEW DESIGN - not Edit Template. This will make a copy of the template so you don’t modify the original.
Rename the copy so you know that one is yours, and close the original template so you don’t modify it.
Watch and follow along with the simple process of using the mini book cover free template on Canva.
Follow These Steps
Make a copy of the template
Collect the images you need and drag and drop them into the uploads area of Canva.
Duplicate the page you plan to use before you begin adding images, so you always have a blank template to work from. The duplicate icon is above the top right corner of each page and looks like a double rectangle with a plus sign.
Drag and drop the images onto the image boxes according to the location on the page you’d like them to be.
Optional: After you’ve filled multiple pages worth of images to print, you can condense them onto fewer pages to waste less paper by scooting them closer together.
Once you’ve finished adding and adjusting images, download the file as a PDF.
Print your images onto sticker paper. I recommend these Standard White Matte Sticker Sheets from Online Labels. Or, print onto paper and use something like Tombow Adhesive Dots to stick the images in nicely.
If you’re fancy, you can use your Cricut or Silhouette to cut them out. Otherwise, get your scissors ready!